Nov 12, 2011
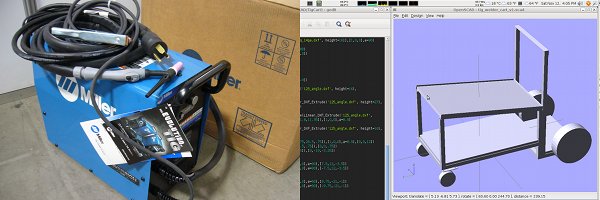
The baby TIG welder has arrived and a tig cart is being drawn using OpenSCAD with py2scad.
Miller Diversion 180 is a great portable (230V/120V) budget entry level air cooled tig welder. It's relatively inexpensive, comes with a 3 year warranty, and is Made in the USA!
For more information, Miller has a few videos explaining the Diversion 180 tig welder on their youtube channel.
Nov 10, 2011

Sep 15, 2011

Aug 10, 2011

Aug 08, 2011

Time flies. The little gang tool block for the Haas TL-2 took a whole day to complete. The gang tool is primary for drilling and tapping operation on the lathe. It's another small step toward automating the TL-2.
Another ~140sqft was added to accommodate the sewing machines. The Tippmann Aerostitch is up and running, though the tensioner still needs some fine tuning. It's a pretty unique American made pneumatic powered industrial sewing machine. How does it fit in with the cnc machines. . . donno. . . .
Jul 06, 2011

The little Lincoln SP170-T MIG welder and the abrasive chop saw are probably the oldest equipment in the shop while OpenSCAD and py2scad are two of the newest tools.
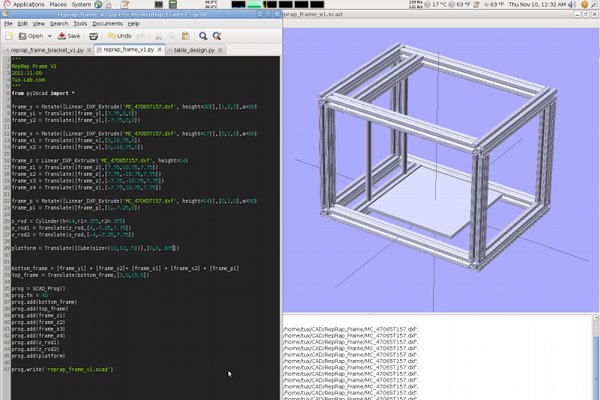
The table and square tubing profiles were first drawn in qcad then extruded and assembled using py2scad for output to OpenSCAD. The tabletop was machined using the Haas SR-100 cnc router and will be bolted to the welded metal table frame.
The table is for a Tippmann Aerostitch pneumatically operated sewing machine. It's one of the few American made heavy duty sewing machine available in the used market. The table still needs to be thoroughly welded, primed, and painted. However, by using open source cad packages, I was able to design, view, and modify the conceptual model and also dimension the parts for machining and cutting.
Jun 20, 2011

The much delayed vacuum table for the Haas SR-100 is finally completed. The vacuum table is piped to the Travaini TRVM40-200 oil ring vacuum pump via 2" pvc piping. With all the valves closed, vacuum gauge shows ~29" of Hg so the pvc piping seem to be fairly air tight. The next crucial test will be the spoil board test.
Jun 19, 2011

What can open source software do for you?
Clockwise from the upper left corner, a chip/oil trap filter for the Haas VF-2SS coolant tank designed with OpenSCAD using IO Rodeo's py2scad openscad file generator. The actual chip filter frame built from lase cut acrylic. Chip filter frame with polyester filter. Chip filter in use.

Jun 16, 2011

The culprit behind the broken tap was a simple human error. The wrong tap was used. Instead of using a taper tap, a bottoming tap was used. Originally, drill and tap clearance was an issue because the stock was mounted directly on top of the table. In this second attempt, two Kurt vices were used.
Video of the drilling and tapping operation.
Jun 13, 2011
After 8 yeas of use, the 35W laser cartridge on the ULS M300 laser engraver finally ran out of steam. The symptom was the rapid lose of laser power after a couple minute of vector cutting. Luckily, the fix was a simple swapping of the laser cartridge.

Clockwise from the upper left hand corner. The arrival of the laser cartridge. The laser cartridge. The back of the laser engrave with the old laser cartridge removed. Installation of the new laser cartridge. No tools were needed and the whole process too less than 5 minutes.
A short video on the test cutting with the new laser cartridge.


