RepRap
| - RepRap Task Summary - | |||
| Rep-Start | Completed | 1.0 hr | $0.00 |
| Extruder V2.0 | Completed | 4.0 hr | $0.00 |
| Taking the Plunge | Completed | 12.0 hr | $0.00 |
| RepRap Motherboard V1.2 | Completed | 4.0 hr | $0.00 |
| StepperMotorDriver V2.3 | Completed | 12.0 hr | $0.00 |
| Uploading Firmware | Completed | 4.0 hr | $0.00 |
| Testing Motherboard V1.2 | Completed | 4.0 hr | $0.00 |
| Imperial Stepper | Completed | 4.0 hr | $0.00 |
| Resuming Repstrap Build | Completed | 4.0 hr | $0.00 |
| Mechanical Parts | Completed | 4.0 hr | $0.00 |
| Electronics Completed | Completed | 8.0 hr | $0.00 |
| Firmware Upload | Completed | 3.0 hr | $0.00 |
| RepRap Frame Design | Completed | 7.0 hr | $0.00 |
Oct 18, 2009
Oct 22, 2009
Dec 01, 2009
Taking the plunge head first into a shallow pool is the result of not reading through the reprap documentations more carefully.
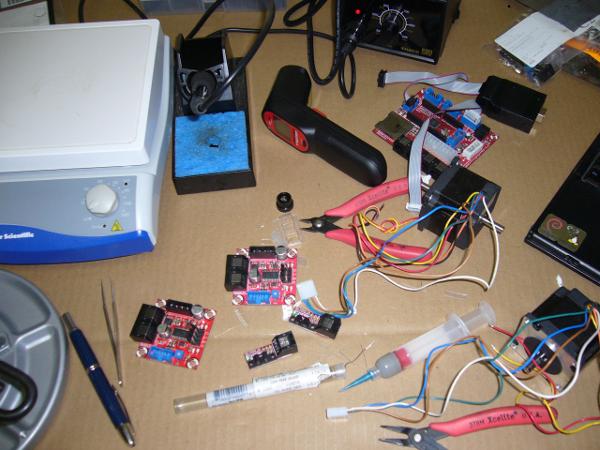
I finally have the electronics portion of the extruder controller V2.2 assembled. . . I thought the initial reflow soldering was passable until I took some desoldering wicks to the SMT chips and took out almost half of the visible solders. Yicks!
Anyway so I have an assembled extruder controller V2.2 only to realize that the Arduino based reprap controller I was so fixated on is old gen2 technology. I've been itching to try out my Arduino board ever since I took the practical electro-mechanical class at ThePublicSchool. Unfortunately, the new gen3 electronics no longer uses Arduino as the main controller and instead uses Sanguino. Gen3 electronics is also "cleaner" looking with integrated power circuit from the main controller board to the peripheral boards such as as the extruder and stepper motor drive via RJ45 connectors.
Arduino, Sanguino what's the difference right? They're both AVR based with Sanguino having more I/O pins and memory. . . probably some other useful stuff as well but I'm still in the AVRTiny phase so that's as deep as my eyes can read and brain can absorb.
Going back to taking the plunge part. So I have the extruder controller with no way to test it. To get around that problem I ordered as many parts as I can to complete the electronics portion of the Repstrap build. Once all the components arrive I will give a cost summary for the electronics portion and start working on the Sanguino based motherboard.
Dec 02, 2009
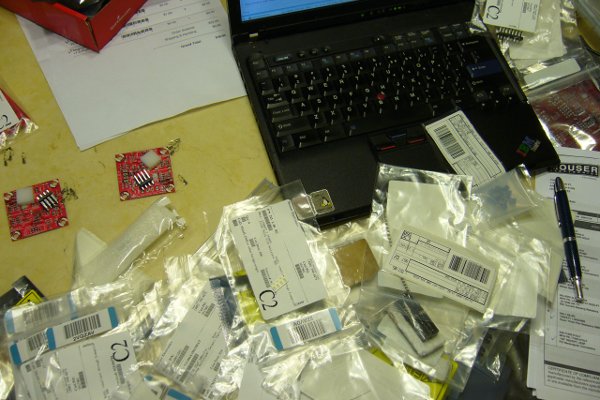
Most of the parts for building the 3rd generation Reprap electronics have arrived and the cost of the mother board is listed below. Too bad Makerbot is out of stock on their motherboard kit because it took hours spanning several days to order, receive, sort, and group all the parts from three different vendors. . . . and this is just for the motherboard, I haven't even started kitting together the 3 stepper motor drive boards.
| Part Name | Qty | Vendor | Vendor Part No | Cost | Ext Cost |
| .100 breakaway header | 6 | Mouser | 571-9-146304-0 | 0.086 | 0.513 |
| 1.8K ohm resistor 1206 | 5 | Mouser | 263-1.8K-RC | 0.050 | 0.250 |
| 10 pin female header | 4 | Digi-Key | S7008-ND | 0.458 | 1.832 |
| 10 pin IDC header | 4 | Mouser | 649-71600-010LF | 0.800 | 3.200 |
| 100nf ceramic capacitor 1206 | 3 | Mouser | 80-C1206C104K5R | 0.070 | 0.210 |
| 10K ohm resistor 1206 | 4 | Mouser | 290-10K-RC | 0.050 | 0.200 |
| 10uF electrolytic capacitor D55 | 1 | Mouser | 647-UUT1H100MCL1GS | 0.080 | 0.080 |
| 15pF ceramic capacitor 1206 | 2 | Mouser | 77-VJ12A100V150J | 0.060 | 0.120 |
| 16Mhz crystal | 1 | Mouser | 695-HC49US-16-U | 0.580 | 0.580 |
| 180 ohm resistor 1206 | 1 | Mouser | 263-180-RC | 0.050 | 0.050 |
| 1k ohm resistor 1206 | 2 | Mouser | 290-1.0K-RC | 0.050 | 0.100 |
| 3.3k ohm resistor 1206 | 3 | Mouser | 263-3.3K-RC | 0.050 | 0.150 |
| 30 ohm resistor 5W | 1 | Digi-Key | 30W-5-ND | 0.340 | 0.340 |
| 3M sd card socket | 1 | Mouser | 57-SD-RSMT-2-MQ | 1.300 | 1.300 |
| 4 pin female header | 4 | Digi-Key | S7037-ND | 0.383 | 1.532 |
| 4.7k ohm resistor 1206 | 2 | Mouser | 263-4.7K-RC | 0.050 | 0.100 |
| 6 pin IDC header | 1 | Mouser | 649-75869-131LF | 0.430 | 0.430 |
| Atmega644P tqfp | 1 | Digi-Key | ATMEGA65P-20AU-ND | 7.760 | 7.760 |
| ATX Motherboard header | 1 | Mouser | 538-39-29-3206 | 1.860 | 1.860 |
| Green LED 1206 | 1 | Digi-Key | 350-2053-1-ND | 0.238 | 0.238 |
| Omron B3F-1000 Button | 1 | Mouser | 653-B3F-1000 | 0.230 | 0.230 |
| RED LED 1206 | 1 | Mouser | 645-598-8210-107F | 0.100 | 0.100 |
| RJ45 Jack | 4 | Mouser | 571-5555164-1 | 0.740 | 2.960 |
| SN75176A SOIC | 1 | Mouser | 595-SN75176AD | 0.880 | 0.880 |
| SPDT switch | 1 | Mouser | 10SP001 | 0.380 | 0.380 |
| RepRap Motherboard V1.2 PCB | 1 | MakerBot | tv274 | 8.000 | 8.000 |
| Subtotal: | 33.395 |
Dec 04, 2009
 The laborious task of kitting together the Stepper Motor Driver V2.3 is done. Though I just discovered that Stepper Motor Drive V3.0 is in the works. It looks like the stepper motor driver IC will be changed from Allegro A3982 to A3977. I haven't progressed far enough in my microcontroller circuit building to understand the different but a quick search says something about A3977 gives a 25% increase in peak current. The cost for Stepper Motor Driver V2.3 is as follows.
| Part Name | Qty | Vendor | Vendor Part No | Cost | Ext Cost |
| .156” 4 position housing | 1 | Mouser | 538-09-50-3041 | 0.250 | 0.25 |
| .156” crimp-on connector | 4 | Mouser | 538-08-52-0072 | 0.080 | 0.32 |
| .156 header | 4 | Mouser | 538-26-48-1245 | 0.084 | 0.34 |
| .22uF ceramic capacitor 1206 | 1 | Digi-Key | 339-1251-1-NDD | 0.143 | 0.14 |
| 0.25 ohm resistor 2512 | 2 | Digi-Key | CSRN20.25FICT-ND | 0.608 | 1.22 |
| 10 pin IDC connector | 2 | Digi-Key | 609-1839-ND | 0.710 | 1.42 |
| 10 pin IDC header | 1 | Mouser | 649-75869-101LF | 1.030 | 1.03 |
| 100nF ceramic capacitor 1206 | 5 | Mouser | 80-C1206C104K5R | 0.070 | 0.35 |
| 100uF electrolytic capacitor D55 | 2 | Digi-Key | 493-3209-1-ND | 0.867 | 1.73 |
| 10k ohm resistor 1206 | 1 | Mouser | 290-10K-RC | 0.050 | 0.05 |
| 10k trimpot | 1 | Mouser | 72-T70YE-10K | 0.740 | 0.74 |
| 1k ohm reistor 1206 | 4 | Mouser | 290-1.0K-RC | 0.050 | 0.20 |
| 1nF ceramic capacitor 1206 | 1 | Mouser | 80-C1206C102K5R | 0.090 | 0.09 |
| 2.2k ohm resistor 1206 | 1 | Mouser | 263-2.2K-RC | 0.050 | 0.05 |
| 4 pin molex connector | 1 | Mouser | 538-15-24-4745 | 0.840 | 0.84 |
| 7805DT | 1 | Mouser | 863-MC7805CDTRKG | 0.470 | 0.47 |
| A9382 | 1 | Digi-Key | 620-1299-1-ND | 5.810 | 5.81 |
| Green LED 1206 | 1 | Digi-Key | 350-2053-1-ND | 0.238 | 0.24 |
| Red LED 1206 | 3 | Mouser | 645-598-8210-107F | 0.100 | 0.30 |
| RJ45 Jack | 2 | Mouser | 571-5555164-1 | 0.740 | 1.48 |
| Stepper Motor Drive V2.3 PCB | 2 | MakerBot | tv448 | 3.000 | 6.00 |
| 10 pin ribbon cable | 1 | Mouser | 523-191-2801-110FT | 0.470 | 0.47 |
| Subtotal: | 23.54 |
Dec 16, 2009
After many days of futile attempts to upload the firmware . . . . I finally succeeded in uploading the reprap firmware through arduino ide. Originally though I was unable to load the bootloader through arduino ide, I was able to upload it using commandline avrdude. The error message I received through arduino ide is,
avrdude: stk500_2_ReceiveMessage(): timeout
I did not know if the error is due to assembly/soldering error or from improper arduino IDE setting. Since I can view the ATmega644p setting and upload the bootloader with avrdude I lean toward a misconfigured arduino setting. I tried the reprap forum as well as googling for solutions, but still could not solve my problem. I came across a blog that mentioned improper baudrate setting and I started to experiment with different baudrate setting using avrdude. I found that only 115200 seems to work and other baudrate settings gave timeout errors similar to the error from arduino. I ended up inserting
sanguino.upload.speed=115200
into my arduino board.txt file and following the upload instruction with the obligatory reset the firmware loaded, the green power led lights up and I was able to turn the ATX power supply on with the reprap motherboard on/off switch. Wow!
Next is to test the stepper driver and extruder board
Dec 09, 2009
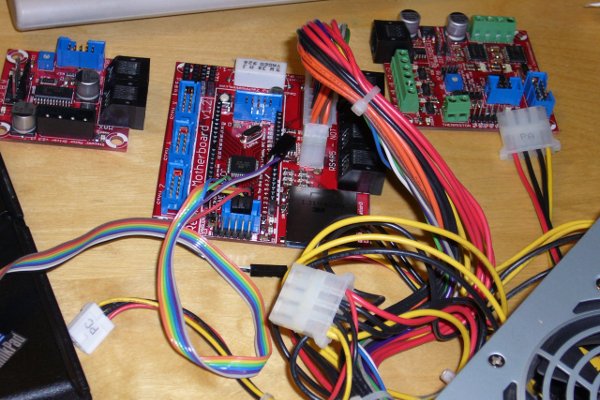 One of the three stepper motor drive V2.3 board along with motherboard V1.2 has been completed but I had trouble getting the Motherboard to show signs of life. I was able to load the bootloader through avrdude with a parallel port programmer from Sparkfun but could not get the arduino IDE to work properly. It took a while to convert the 10 pin isp to the 6 pin isp format, which basically was just remapping of the MOSI, MISO, VCC, GRD, Reset, and SCK.
Dec 25, 2009
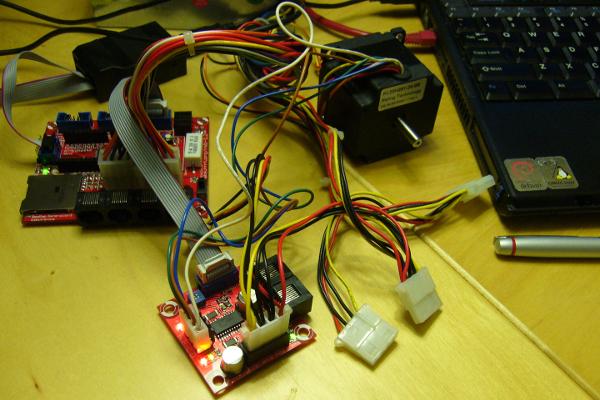 Wow. The Imperial March never sounded so good. Stepper Motor Driver works! The stepper motor driver test program was loaded into the Sanguino motherboard using USBtiny from adafruit. I switched from parallel STK200 programmer to usb based USBTiny programmer in hope of using the arduino IDE to upload the reprap firmware sketches however I am still having difficulties loading programs into the Sanguino motherboard using the Arduino IDE.
The NEAM 23 stepper motor is from Makerbot and costs $28.00 each. Too bad the stepper motor is not made in a free and democratic country. Anyone know of a US source for the Nanotec stepper motors?
Jun 27, 2010
I got a bit rusty after 6 month of inactivity. I started with the stepper motor driver. Sorting out the .22uf and the 1nf capacity took a while and I had forgotten to place the red and green led until the hotplate was already at ~202C and I saw the missing leds. . . Hastily, I turn the hotplace back on, placed the leds and added a dab of soldering paste onto each pad. Hopefully, I didn't overcook the whole assembly by tripling the soldering time. . . .
I was able to complete one motor driver board assembly plus two Optoendstops.
Jun 28, 2010
The cost of the mechanical parts are as follows. The actual cost is probably a little less. The parts where ordered from McMaster back in January so I don't remember how many "extra" parts I ordered that may have inflated the overall order. Anyway, the pulleys and the rods are a bit pricy.
| Part Name | Qty | Vendor | Vendor Part No | Cost | Ext Cost |
| Trapezoidal-Tooth Belt /ft | 16 | McMaster | 7959K21 | 1.810 | 28.96 |
| Timing Belt Pulley 20 Teeth | 3 | McMaster | 1375K39 | 9.810 | 29.43 |
| Timing Belt Pulley 60 Teeth | 4 | McMaster | 1375K57 | 14.630 | 58.52 |
| O1 Tool Steel Rod 3' | 10 | McMaster | 88625K67 | 4.880 | 48.80 |
| 316 Stainless M8 Rod | 8 | McMaster | 94185A160 | 11.95 | 95.60 |
| Misc Spring, Bolt, and Nuts | various | McMaster | various | 107.68 | 107.68 |
| Subtotal: | 368.99 |
Jul 14, 2010
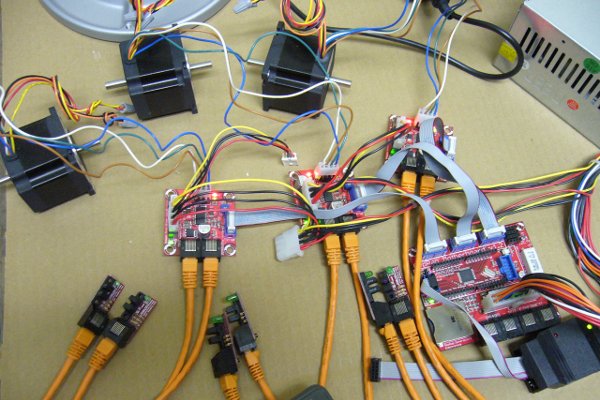
At long last the reprap electronics components are completed. The last stepper motor driver 2.3 has been reflow soldered along with the assembly of the 4 remaining OptoEndstops.
Using the stepper motor test program it seems that all the servo motors and optoendstops are running.
Jul 19, 2010
Documentation on the Reprap firmware is a bit confusing with multiple unreferenced version. Following the installation instruction, the Sanguino Master Firmware was uploaded into Reprap Motherboard V1.2 via a Atmel STK500v2 through serial port. ReplicatorG was then installed and interfaces with the RepRap Motherboard through a Sparkfun USB-TTL board via a usb port.
It should be a fairly simple process, but there are a few versions of the firmware upload instruction each using a different version of the firmware. Before compiling and uploading each firmware, the bootloader must be burned through the Arduino IDE. . . . so it took a couple hours of trial and error to figure it out. I think the file reprap-mendel-20100702.zip contains the latest motherboard firmware and also the latest reprap interface, ie ReplicatorG. . . I think.
The X, Y and Z axis stepper motor tests okay with the Reprap interface.
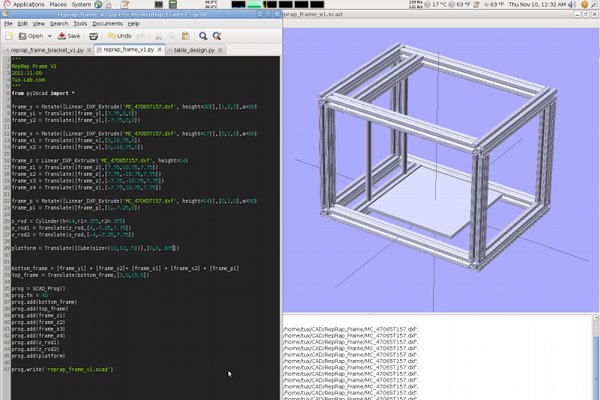
Nov 10, 2011